


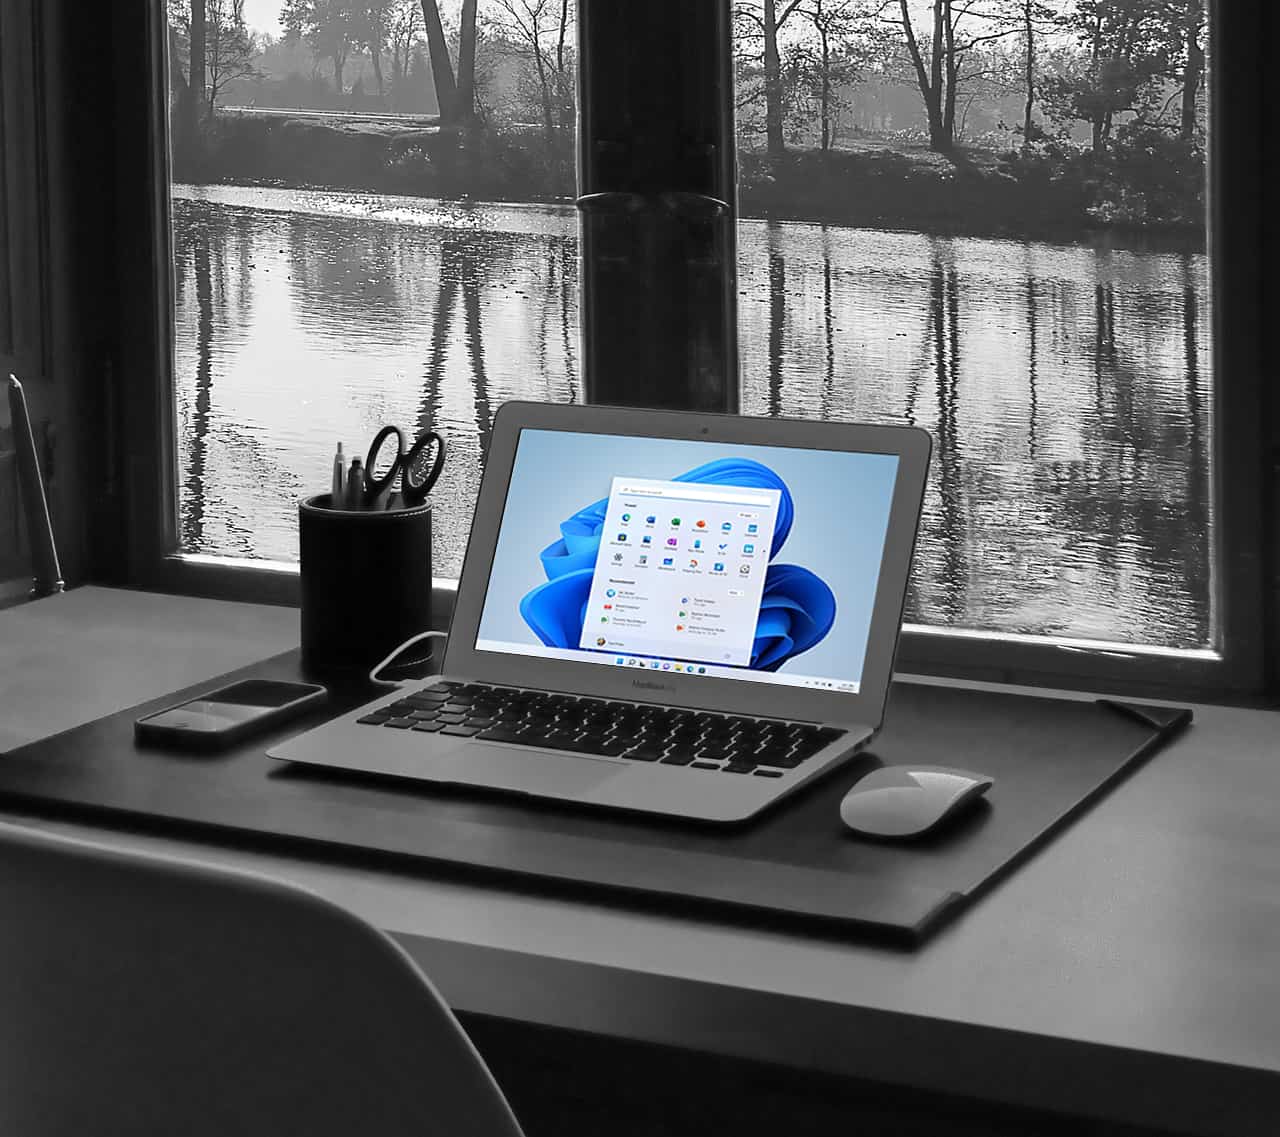
Windows 11 is out and if you are also using a PC, you most likely have received a notification to update to Window 11. However, what if you are a Mac user?
Since the launch of Windows 11, there hasn't been much about installing Windows 11 on a Mac, other than Microsoft preparing a Windows 11 version which will be compatible with the M1 chip on which the latest Mac computers have. However, since now, there hasn't been much about installing Windows 11 on an intel-based Mac, till now!
In this guide, I am going to show you step by step how to install Windows 11 on your Mac with BootCamp Assistant.
Windows 11 requirements for Mac
- Mac which supports Windows 10 installation with Boot Camp Assistant.
- Mac which meets the Windows 11 system requirements except TPM 2.0.
- Internet Connection
- A Time Machine backup in case something goes wrong during the process.
Can Windows 11 run on a Mac?
Microsoft is known to have very relaxed system requirements when it comes to updating Windows OS to the latest major update.
Windows 11 minimum system requirements
Microsoft has released the minimum system requirements which every computer must have in order to be able to run Windows 10. Here are the Windows 11 minimum requirements, as specified by Microsoft:
- Processor: 1 gigahertz (GHz) or faster with 2 or more cores on a compatible 64-bit processor or System on a Chip (SoC).
- RAM: 4 gigabyte (GB).
- Storage: 64 GB or larger storage device.
- System firmware: UEFI, Secure Boot capable.
- TPM: Trusted Platform Module (TPM) version 2.0.
- Graphics card: Compatible with DirectX 12 or later with WDDM 2.0 driver.
- Display: High definition (720p) display that is greater than 9” diagonally, 8 bits per color channel.
Looking at them, it may seem like you meed all of them, right? However, Windows 11 seems to have tighten up the requirements which makes it very difficult to run on Mac computers due to the TPM 2.0 requirement.
Can Mac support TPM 2.0?
There are several Macs which support TPM 2.0, but it's not supported on the motherboard and hence, there isn't a Mac computer at the moment which officially supports Windows 11. For that case, either Microsoft has to remove the TPM 2.0 requirement, Apple to update Macs to support this requirement or (the big or!), to bypass this requirement completely which is exactly what we are going to do in this guide!
All Macs with TPM 2.0 support
Here are all Macs with TPM (or else, Trusted Platform Module) 2.0 support in the CPU.
- MacBook (Retina, 12-inch) 2017 and up
- MacBook Air (13-inch) 2017 and up
- MacBook Pro (15-inch) 2016 and up
- MacBook Pro (13-inch, Four Thunderbolt 3 ports) 2016 and up
- MacBook Pro (13-inch, Two Thunderbolt 3 ports) 2016 and up
- Mac mini 2018 and up
- iMac Pro 2017 and up
- iMac (Retina 5K, 27-inch) 2017 and up
- iMac (Retina 4K, 21.5-inch) 2017 and up
- iMac (21.5-inch) 2017 and up
- Mac Pro 2019 and up
Any other Mac doesn't have TPM 2.0 support. However, some of the older Macs do support Boot Camp Assistant and you are able to install Windows 10 on them.
How to install Windows 11 on Mac?
The method we are going to follow, is the same as installing Windows 10 on a Mac. The only difference is that since Boot Camp Assistant doesn't support Windows 11 yet, there isn't a Windows Support Software for Windows 11 and if you attempt to install Windows 11 by using the Windows 11 ISO file it will crash during the download process. The only way to install Windows 11, is to trick Boot Camp Assistant into thinking that we are installing Windows 10 instead of 11. Don't worry though, you will still get all the features that Windows 11 will provide to you!
1. Check the requirements
While we spoke about TPM, it's important to check if you indeed meet all of the requirements. To check your system specifications:
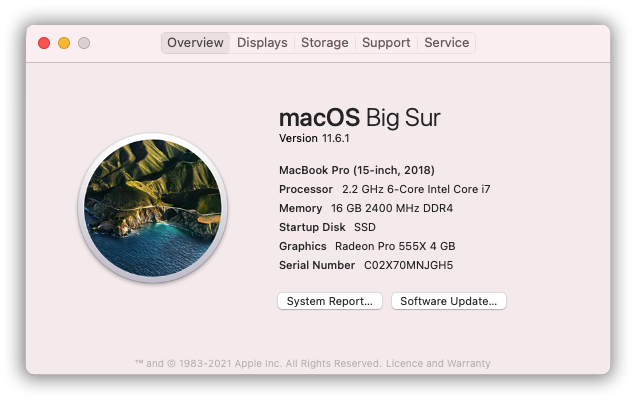
- On the top menu bar, click on the Apple logo () and choose About this Mac.
- Check if you meet the processor and RAM requirement. No need to worry about graphics card and display.
Ensure that your Mac supports Secure boot. To check this:
- Go to Finder and then go to Applications > Utilities and launch System Information.
- Under Hardware on the left, select Controller.
- Next to Model Name, check if it says Apple T2 Security Chip or similar.

I also need to emphasize that you need to allocate at least 64GB of storage on Windows 11. This means that you need to ensure that you have about 120GB of free storage (or more if needed). Of course, if you don't have enough free space yet, I highly encourage you to read the detailed guide that I wrote to release as much free space as possible from your Mac:
If you follow the guide from the start to end, you could end up freeing more than 100GB of storage! I highly highly recommend you to have a look!
Once you have done the steps above, then we are ready to begin with preparing the Windows 11 ISO file!
2. Create the Windows 11 ISO file
For this step, you will need to do two things:

We will need the Windows 10 ISO file as well, given that BootCamp Assistant has a full support of Windows 10. We are going to use the Windows 10 ISO file and add the "installer" from Windows 11 to it. Let's see exactly how we can do that.
- Create a new folder on your Desktop by right clicking and name it as "windows 11".
- Go to the Downloads folder and locate the Windows 10 ISO.
- Right click on the Windows 10 ISO file and open it with DiskImageMounter.
- Copy and paste the contents of Windows 10 into the "windows 11" directory you just created.
- Close and eject Windows 10 ISO.
- Right click on the Windows 11 ISO file and open it with DiskImageMounter.
- Open the "sources" folder.
- Copy "Install.wim" onto the desktop.
- Close and eject Windows 11 ISO.
- Open the windows 11 directory and go to sources.
- Delete the install.wim file located in there.
- Drag and drop the install.wim file which we copied to the Desktop in step 8.
- Close all the folders to avoid having too many windows open.
Now you should have the windows 11 directory ready. All we need to do now is to convert the folder into an ISO file. Luckily, you can do this on your Mac without downloading a 3rd party software!
- Open Finder and go to Applications > Utilities and launch Disk Utility.
- From the menu bar on the top, select File, then New Image then Image from Folder...
- Drag and drop the windows 11 folder into the window to and click on Choose.
- Next to Image Format, select DVD/CD master.
- Then click on Save.

Now we have created a .cdr file which is one step before turning it into an ISO file.
- Open Finder, then go to Applications > Utilities and launch Terminal.
- On Terminal, type:
cd ~/Desktopand hit enter, to point Terminal on Desktop. - Again on Terminal, type:
hdiutil makehybrid -iso -joliet -o windows\ 11.iso windows\ 11.cdrand hit enter. - Wait until this process is done.

Now you should see a new file in your desktop with the .iso extension.
Awesome, now we have the ISO file ready! Now let's move to BootCamp Assistant to create the bootcamp partition which we will use to install Windows 11.
3. Create the BootCamp partition using Boot Camp Assistant
Boot Camp Assistant is a utility software which we will use to create the BootCamp partition to get our Mac ready to install Windows 10.
All Macs that can run Windows 10
- MacBook: 2015 and up
- MacBook Air: 2012 and up
- MacBook Pro: 2012 and up
- Mac Mini: 2012 and up
- iMac: 2012 and up
- iMac Pro: All models
- Mac Pro: 2013 and up
If you don't own one of the above Macs, then you most likely won't be able to install Windows 11 on your machine, though, you may still be able to install Windows 11 without bootcamp.
Here's how to create the BootCamp partition:
- Open Finder, then go to Applications > Utilities and launch Boot Camp Assistant.
- Unplug all external storage devices from your Mac (USB, Hard drives, SSD etc).
- On Boot Camp Assistant, press on Continue.
- Drag and drop the windows 11 ISO file you have created earlier from Desktop to Boot Camp Assisstant.
- Resize the partition by dragging the dot between "macOS" and "Windows".
- Make sure that Windows have at least 64 GB of storage. I set it as 65GB for Windows.
- Remember to ensure you are absolutely happy with the partition size, as you won't be able to change this in the future, unless you re-install Windows 11.
- Once you are happy, press on Install at the bottom right.
Boot Camp Assistant is going to take some time to create the Windows partition and during this process, your Mac will freeze and become very slow. I encourage you to leave your Mac until this process is done.
4. Install Windows 11 on Mac
Once BootCamp is ready, then your Mac will restart on its own. If not, then be sure to restart it by clicking on the Apple logo () on the top left and choose Restart.
- When you hear the beep, holt down the alt key.
- You should see the boot selection screen in your screen. Choose BootCamp (or Windows).
- Now you should end up to the Windows installation setup.
- Once you select your keyboard layout, region and you continue, enter you Windows 11 product key. If you don't have it, press on "I don't have a product key".
After following the instructions, you should end up to the Windows 11 installation screen. Follow the steps until you end up to the Windows 11 desktop screen.
Then, you should have the bootcamp support software installation wizard in front of your screen. Click on install and let Boot Camp install all the drivers for you.
Note: There's no guarantee that all the drivers will work and we still don't know how well Windows 11 will run by using this method. Given that this is the only method to install Windows 11, some people may have problems with the installation. Any problems, be sure to drop them down in the comment section!
Conclusion
I hope you managed to install Windows 11 on your Mac with this and only method available. I understand that some users may have problems in some steps and the process may not work as expected. If however you face any problems, then be sure to let me know down in the comments section and I will try my best to help you!
In the meantime, I hope you stay safe and healthy!

Ordina:
Visualizza: