


While lately, Apple devices are experiencing problems and bugs in their operating system, there are other brands which are playing the "catchup" game with more affordable prices. During this article, I will show you the official, most trusted and easiest way to reset your Mac to its factory settings.
This is the safest method which guarantees a complete destruction of your data, meaning it will be extremely hard to recover them.
Of course, if you want to use your data, make sure to back them up before proceeding, by using Time Machine.
You'll need
- Your Mac
- External Hard Drive for backup
This article is based on our YouTube video with almost 1M hits!
Steps
- From the login screen, reboot your Mac and as soon as the screen turns black, hold down command and R key to enter the Recovery menu. Remember, it can take a while for the Recovery to load sometimes.

- From the Recovery menu, select Disk Utility.
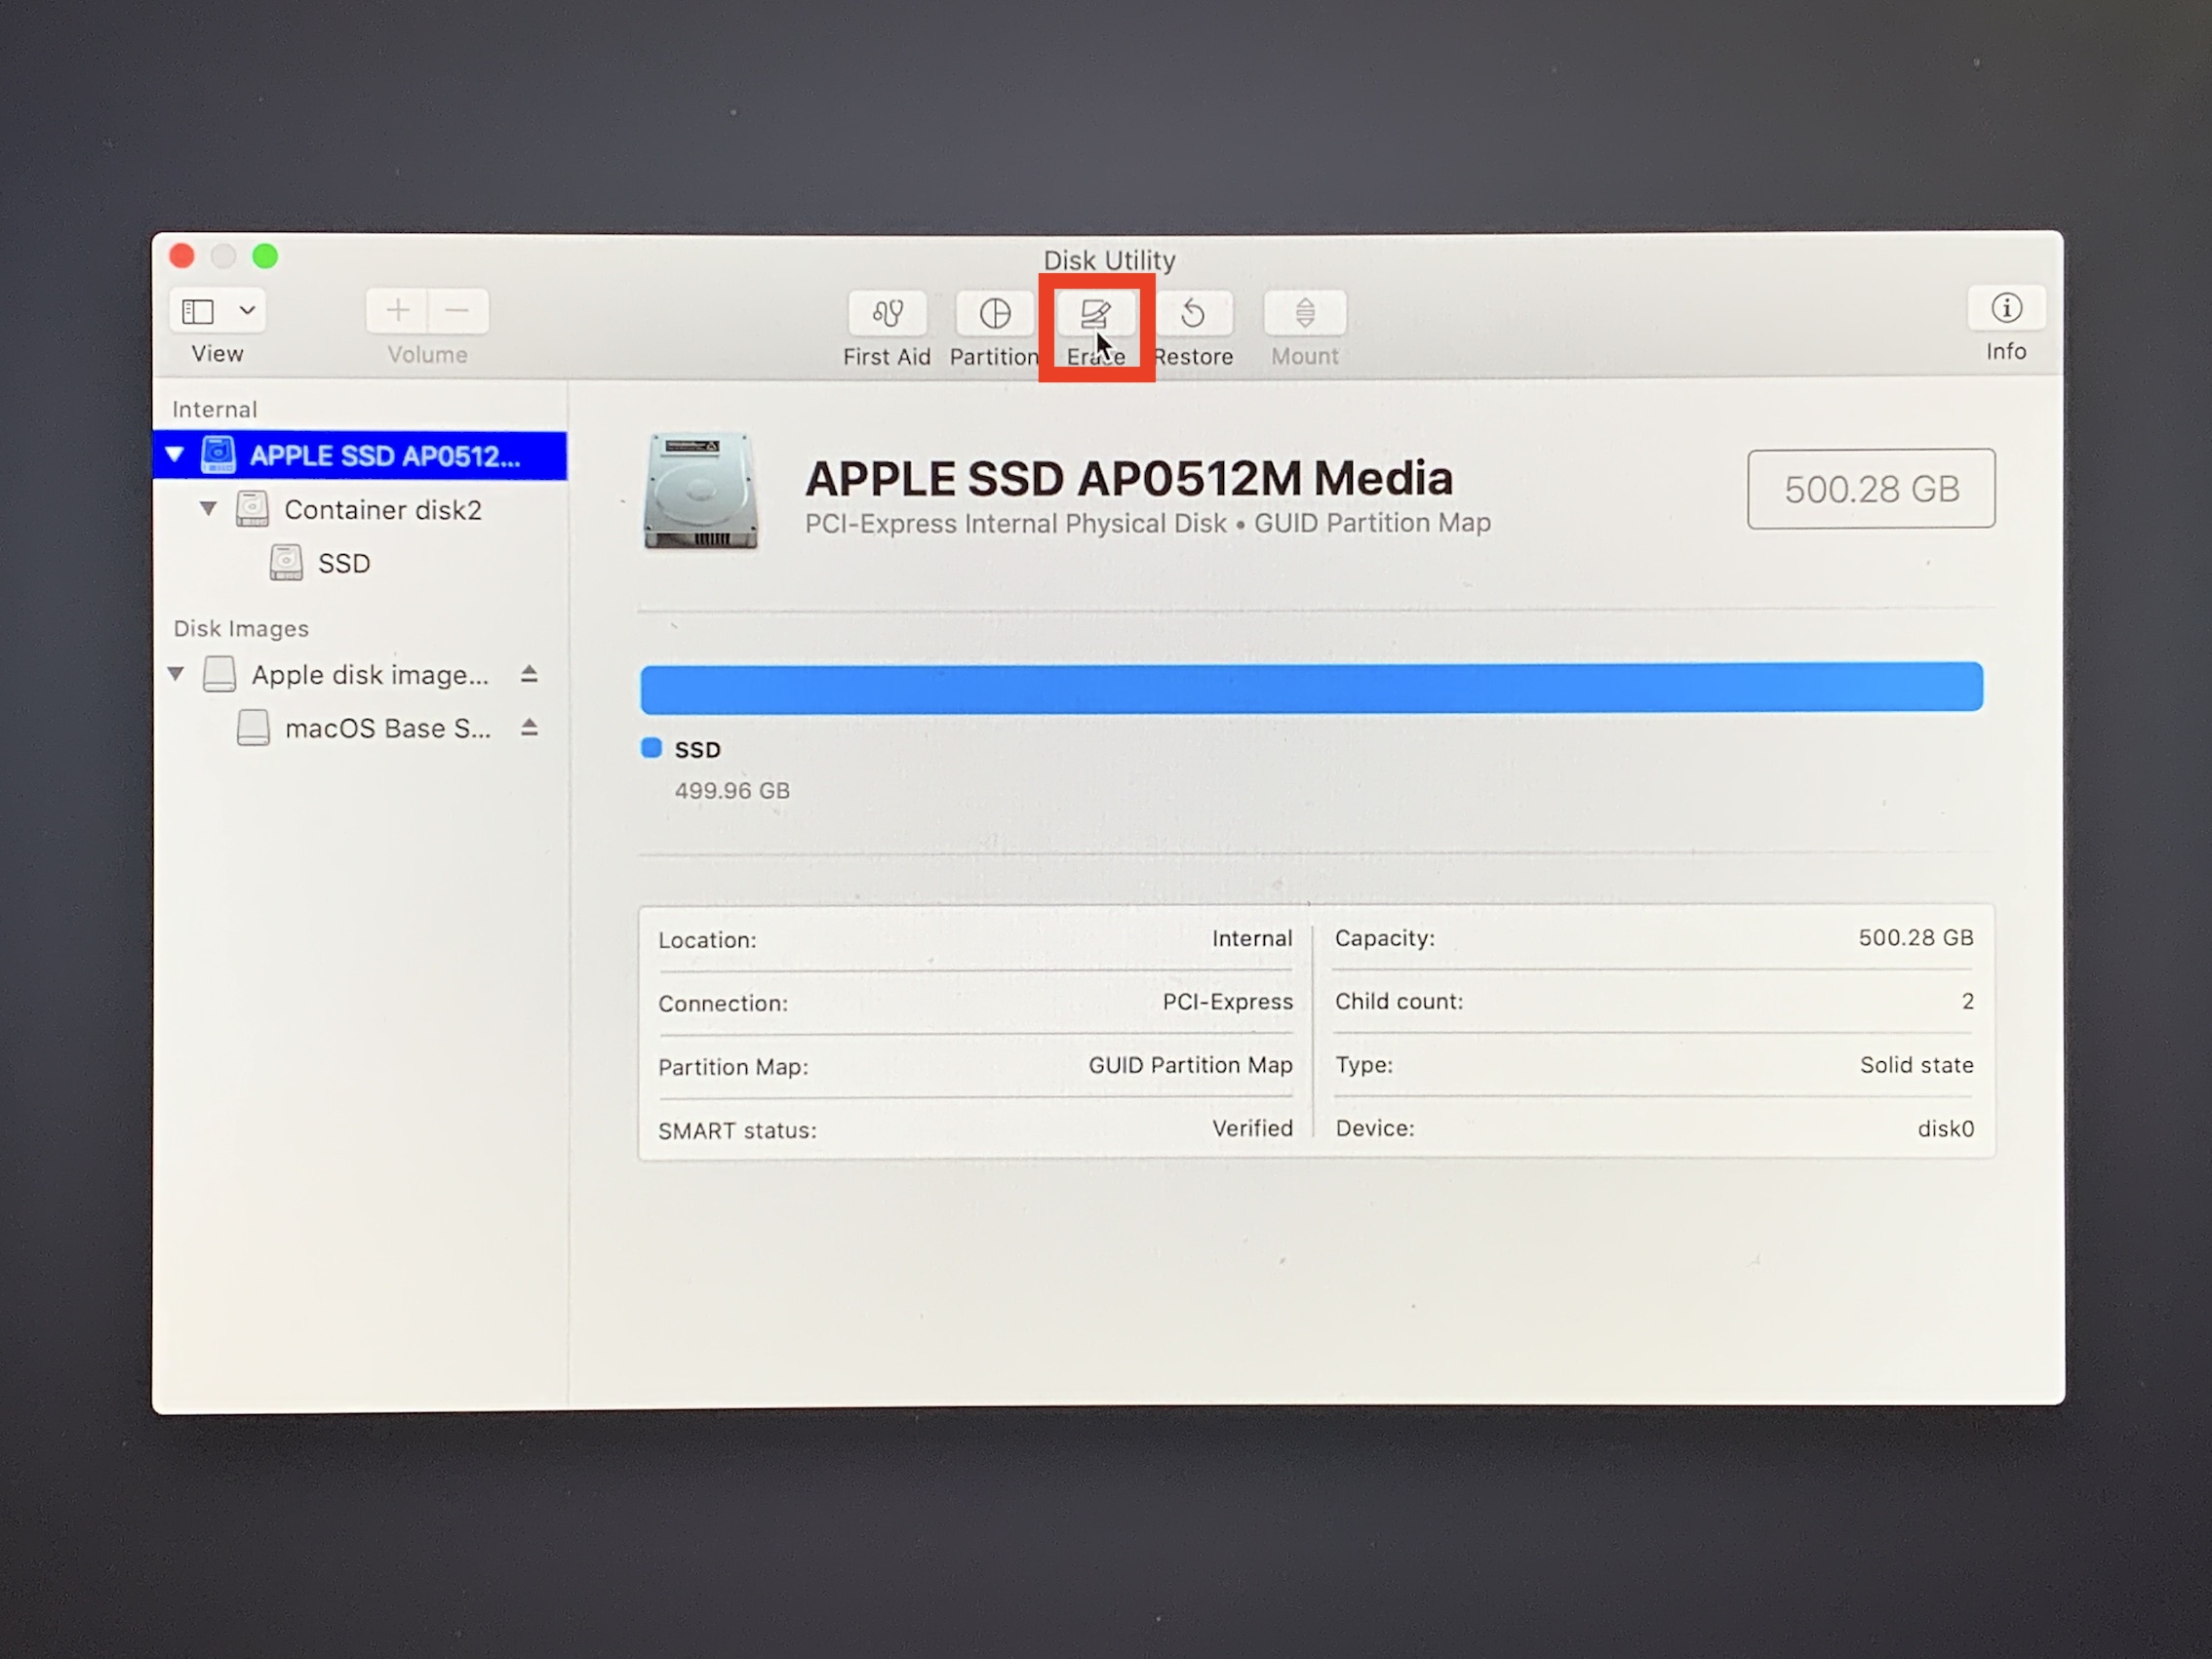
- A new Window should open up. From Disk Utility, select your main hard drive.
You may need to expand the Disk list view by clicking on the top left button and select View All Devices.
- From your selected disk, click on the Erase button on the top middle of the window.
- A dialog window should open up with two inputs. On the first input you need to name the hard drive. In my case, I name it as SSD. The second defines the data format of the disk. Select Mac OS X Extended (Journaled).
- Once you see the success prompt, you are pretty much done. If you wish to re-install macOS on your system, then close disk utility and select Install macOS. Notice that the latest version of macOS will be downloaded and installed to your system.
- The macOS installer will open up. After agreeing, select the main hard drive to which you would like to install the latest macOS version. You may need to enter your Apple ID.
- Wait until your Mac finishes the installation.
- After this, you will enter the setup screen where you need to setup your Mac, like you did when you first purchased it. In case you would like to restore your backup to your Mac, we have made a video for this purpose!


That's it. Once the setup process is finished, then you will have a fresh new install of the latest version of macOS.
Furthermore, we love feedback as much as we produce these content. If you have ideas on what we can do better, let us know in the comment section.

Zamów:
Wyświetl: